Are you ready to embark on a journey that will take you beyond the limits of your imagination? Night sky photography is a unique and captivating form of photography that allows you to capture the beauty and mystery of the night sky. From the breathtaking colors of the aurora borealis to the stunning beauty of the Milky Way, night sky photography offers a world of possibilities for the adventurous photographer. In this comprehensive guide, we will explore the techniques and equipment needed to get started in night sky photography, as well as tips and tricks for capturing stunning images of the night sky. So grab your camera and let’s get started!
What is Night Sky Photography?
Definition and Explanation
Night sky photography is a unique and captivating form of astrophotography that involves capturing images of the night sky, celestial objects, and the Earth’s atmosphere. This type of photography is not only awe-inspiring but also challenging due to the limited light conditions and the need for specialized equipment.
The night sky provides a breathtaking backdrop for photography, with the Milky Way, stars, planets, and other celestial bodies visible against the dark expanse of space. Capturing these celestial wonders requires careful planning, patience, and specialized equipment. Night sky photographers often use long exposures, wide-angle lenses, and specialized filters to capture the intricate details of the night sky.
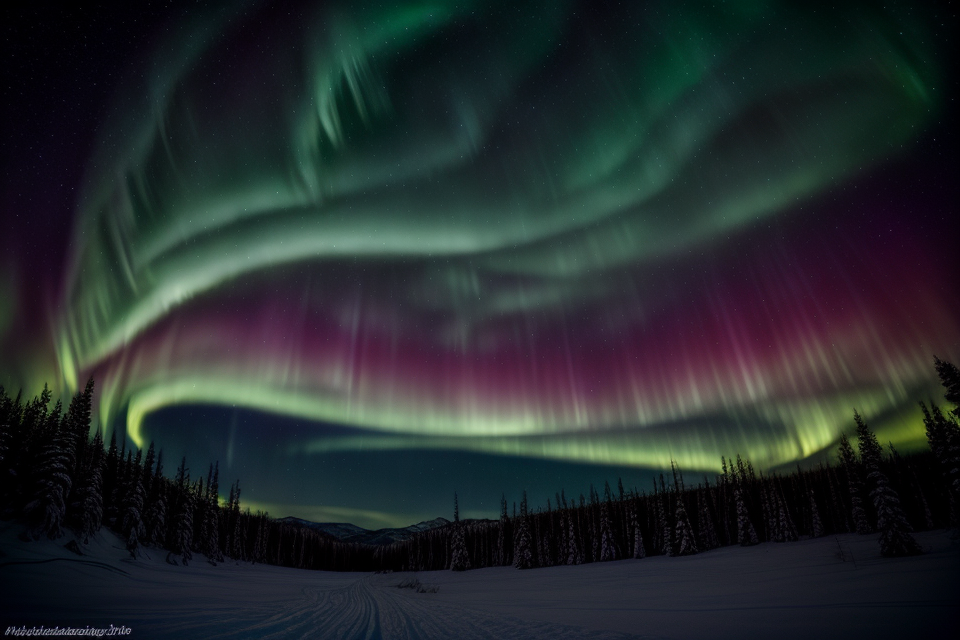
In addition to capturing celestial objects, night sky photography also includes capturing the Earth’s atmosphere, including the Northern Lights, meteor showers, and the moon. These natural phenomena provide stunning visuals that can be captured with the right equipment and techniques.
Overall, night sky photography is a challenging and rewarding form of astrophotography that requires specialized equipment, careful planning, and patience. With the right knowledge and techniques, however, anyone can capture stunning images of the night sky and its many wonders.
Benefits of Night Sky Photography
Capturing the beauty of the night sky through photography offers several benefits, including:
- Improved appreciation of astronomy: Night sky photography helps people to appreciate the beauty and wonder of the universe, which in turn fosters a deeper understanding and interest in astronomy.
- Artistic expression: Night sky photography is a form of art that allows photographers to express their creativity and vision through capturing the beauty of the night sky.
- Personal fulfillment: Many photographers find personal fulfillment in capturing the beauty of the night sky, as it allows them to create something unique and awe-inspiring.
- Scientific curiosity: Night sky photography can also ignite scientific curiosity, as photographers may seek to understand the movements of celestial bodies and the patterns of light in the sky.
- Therapeutic benefits: Stargazing and night sky photography have been known to have therapeutic benefits, reducing stress and promoting relaxation.
- Educational value: Night sky photography can also be used as an educational tool, helping people to learn about the constellations, planets, and other celestial bodies in the sky.
Essential Equipment for Night Sky Photography
Camera and Lens Selection
Selecting the right camera and lens is crucial for capturing stunning night sky photographs. Consider the following factors when making your selection:
- Full-frame or APS-C sensor: Full-frame sensors are better for low-light photography as they have larger pixels that collect more light. However, APS-C sensors are more affordable and still produce excellent results.
- Low-light performance: Look for a camera with good high-ISO performance to capture clear images in low-light conditions.
- Autofocus performance: Fast and accurate autofocus is essential for night sky photography, as it allows you to focus on distant objects like stars and planets.
- Lens selection: Wide-angle lenses (14mm – 35mm) are ideal for capturing the Milky Way and other celestial objects. For closer objects like the Moon and planets, a telephoto lens (85mm – 300mm) is recommended.
- Image stabilization: Image stabilization helps to reduce camera shake and blur in long exposures, ensuring sharper images.
- Weather-sealing: A weather-sealed camera and lens can withstand the elements, making them ideal for outdoor astrophotography.
- Battery life: Long exposures during night sky photography can drain your camera’s battery quickly. Choose a camera with good battery life or invest in an external battery pack.
- Remote shutter release: A remote shutter release allows you to trigger the camera’s shutter without touching it, reducing camera shake during long exposures.
- Tripod: A sturdy tripod is essential for long exposures, ensuring that your camera remains stable and still.
- Polarizing filter: A polarizing filter can help reduce glare and enhance colors in the night sky.
By carefully considering these factors, you can select the ideal camera and lens combination for your night sky photography adventures.
Tripod and Remote Shutter Release
A tripod is a crucial piece of equipment for night sky photography as it provides stability and allows for longer exposures. A sturdy tripod will ensure that your camera remains in the same position throughout the exposure, reducing the chances of blur. It is recommended to use a tripod with a minimum weight capacity of 10 pounds.
In addition to a tripod, a remote shutter release is an essential accessory for night sky photography. This device allows you to trigger the camera’s shutter without touching it, eliminating the risk of camera shake and ensuring sharp images. A remote shutter release can be either wired or wireless, and it is important to choose one that is compatible with your camera model.
Another benefit of using a remote shutter release is that it allows you to take pictures remotely, which can be useful when shooting time-lapse sequences or long exposures. Many camera models have a built-in intervalometer function that can be activated remotely, allowing you to capture a series of images over an extended period without having to physically touch the camera.
When using a tripod and remote shutter release, it is important to ensure that they are set up properly. The tripod should be level and securely attached to the ground, and the remote shutter release should be connected to the camera and positioned for easy access. By using these essential pieces of equipment, you can capture stunning images of the night sky with ease.
Timing and Planning Tools
Night sky photography requires careful planning and timing to capture the perfect shot. The following are some essential tools that can help you plan and execute your night sky photography:
1. Astronomy Apps
There are several astronomy apps available that can help you plan your night sky photography. These apps provide information on the phases of the moon, the position of the stars and planets, and the weather conditions. Some popular astronomy apps include:
- Stellarium: A free and open-source planetarium software that allows you to view an accurate 3D map of the night sky from any location on Earth.
- Sky-Skan: A paid app that provides detailed information on the positions of celestial objects, as well as weather forecasts and moon phases.
- The Photographer’s Ephemeris: A paid app specifically designed for photographers that provides information on the position of the sun and moon, as well as the angle of the sun and moonrise and moonset.
2. Telescope and Binoculars
A telescope or binoculars are essential for night sky photography, as they allow you to view and focus on specific celestial objects. Telescopes and binoculars come in a range of sizes and prices, so it’s important to choose one that suits your needs and budget. Some popular telescopes and binoculars for night sky photography include:
- Telescope: A refractor telescope is a good choice for night sky photography, as it provides sharp and clear images. A 60mm to 80mm aperture should be sufficient for most night sky photography.
- Binoculars: A pair of 10×50 binoculars is a good choice for night sky photography, as they provide a wide field of view and can be used to scan the night sky for celestial objects.
3. Camera and Lens
A camera and lens are essential for capturing images of the night sky. A full-frame camera or a camera with a high-sensitivity sensor is recommended, as it can capture more light and produce less noise in low-light conditions. A wide-angle lens is also recommended, as it allows you to capture a wide field of view and includes more of the night sky in your shot. Some popular camera and lens combinations for night sky photography include:
- Camera: A Nikon D850 or Canon 6D Mark II are popular choices for night sky photography, as they have high-sensitivity sensors and can capture detailed images in low-light conditions.
- Lens: A wide-angle lens such as a 14mm f/2.8 or 24mm f/1.4 lens is a good choice for night sky photography, as it allows you to capture a wide field of view and includes more of the night sky in your shot.
4. Tripod and Remote Shutter Release
A tripod and remote shutter release are essential for keeping your camera still during long exposures and preventing camera shake. A sturdy tripod is recommended, as it can support the weight of your camera and lens and keep it stable during long exposures. A remote shutter release is also recommended, as it allows you to trigger the shutter without touching the camera, reducing the risk of camera shake. Some popular tripod and remote shutter release combinations for night sky photography include:
- Tripod: A sturdy tripod such as a Gitzo GT3540 or a Benro Travel Angel is a good choice for night sky photography, as it can support the weight of your camera and lens and keep it stable during long exposures.
- Remote Shutter Release: A wireless remote shutter release such as the Canon Wireless Remote Control RC-6 is a good choice for night sky photography, as it allows you to trigger the shutter without touching the camera, reducing the risk of camera shake.
Composition Techniques for Night Sky Photography
Framing the Night Sky
Capturing the beauty of the night sky requires careful consideration of composition techniques. One of the most important aspects of night sky photography is framing the sky. Framing the night sky effectively can make a significant difference in the overall aesthetic of the photograph.
The first step in framing the night sky is to find a suitable location. Ideally, the location should provide an unobstructed view of the sky, free from light pollution and distractions. The best time to take night sky photographs is during the summer months when the sky is clear and dark.
Once you have found a suitable location, it is important to consider the position of the camera. The camera should be positioned at a low angle, looking up towards the sky. This angle provides a more dynamic and dramatic perspective, and allows the viewer to appreciate the vastness of the night sky.
Another important consideration when framing the night sky is the use of foreground elements. Including foreground elements, such as trees, buildings, or mountains, can add depth and interest to the photograph. These elements can also provide a sense of scale, helping the viewer to appreciate the size of the night sky.
In addition to these considerations, it is important to pay attention to the position of the moon and stars in relation to the horizon. The moon and stars can add interest and drama to the photograph, and their position can affect the overall composition. It is important to consider the position of the moon and stars when framing the night sky, and to use them to create a visually pleasing composition.
Overall, framing the night sky is an essential aspect of night sky photography. By considering the location, camera position, foreground elements, and position of the moon and stars, photographers can create stunning images that capture the beauty and wonder of the night sky.
Star Trails and Light Painting
Capturing the beauty of the night sky is an art form that requires careful planning, timing, and execution. Two popular techniques for night sky photography are star trails and light painting. Both techniques can create stunning images that showcase the wonder of the night sky.
Star Trails
Star trails are a beautiful phenomenon that occurs when the stars appear to move across the sky over a period of time. To capture star trails, photographers must take multiple long exposure shots over a period of several minutes to hours. During this time, the Earth rotates, causing the stars to appear to move in a circular pattern across the sky.
To create a successful star trail image, photographers must first find a location with minimal light pollution and a clear view of the night sky. They should also use a tripod to keep the camera steady during the long exposure period. A wide-angle lens is recommended to capture as much of the sky as possible.
When taking the photographs, it is important to use a low ISO, a long exposure time, and a narrow aperture to capture as much detail as possible. It is also helpful to use a remote shutter release or a timer to avoid any movement while the camera is taking the images.
Once the images have been captured, photographers can stack them using software such as Adobe Photoshop to create a final image with the star trails. The resulting image can be a stunning representation of the beauty of the night sky.
Light Painting
Light painting is another technique used in night sky photography. This technique involves using a flashlight or other light source to paint the outline of an object or scene in the dark. The resulting image can create a unique and captivating image of the night sky.
To create a successful light painting image, photographers must first find a location with minimal light pollution and a clear view of the night sky. They should also use a tripod to keep the camera steady during the long exposure period. A wide-angle lens is recommended to capture as much of the sky as possible.
To light paint the scene, photographers can use a flashlight or other light source to create the desired outline or shape. They can also use a glow stick or other light-emitting object to add color to the image.
Once the images have been captured, photographers can stack them using software such as Adobe Photoshop to create a final image with the light painting. The resulting image can be a stunning representation of the beauty of the night sky.
Overall, both star trails and light painting techniques can create stunning images of the night sky. With careful planning, timing, and execution, photographers can capture the beauty of the night sky and create images that inspire and awe.
Incorporating Landscapes and Foreground Elements
When it comes to night sky photography, incorporating landscapes and foreground elements can add depth and interest to your shots. By including elements of the surrounding environment, you can create a sense of scale and place, while also adding visual interest to your images.
Here are some tips for incorporating landscapes and foreground elements in your night sky photography:
- Scout your location: Before you arrive at your shooting location, take the time to scout out the area and look for interesting landscapes and foreground elements that you can incorporate into your shots. Consider the type of terrain, the presence of trees, mountains, or other natural features that can add interest to your images.
- Use a wide-angle lens: A wide-angle lens can help you capture a broad view of the landscape, including the night sky and foreground elements. This type of lens allows you to capture a wide field of view, which can be especially useful when shooting in low-light conditions.
- Experiment with different angles: Try different angles and perspectives to create unique compositions. You can shoot from a low angle, looking up at the night sky, or from a high angle, looking down at the landscape below. Experiment with different angles to find the one that works best for your shot.
- Use leading lines: Leading lines are a powerful composition technique that can help guide the viewer’s eye through the image. Look for natural leading lines, such as roads, paths, or streams, that can lead the viewer’s eye from the foreground to the night sky.
- Include people or animals: Including people or animals in your shots can add a sense of scale and human interest to your images. You can use silhouettes or faintly visible figures to add interest to your images, while also creating a sense of scale.
By incorporating landscapes and foreground elements into your night sky photography, you can create stunning images that are both visually interesting and aesthetically pleasing. So, take the time to scout out your location, experiment with different angles and perspectives, and use leading lines and people or animals to create unique compositions that capture the beauty of the night sky.
Exposure and Camera Settings for Night Sky Photography
Understanding ISO, Shutter Speed, and Aperture
Mastering the art of night sky photography requires a solid understanding of the exposure triangle, which consists of ISO, shutter speed, and aperture. These three elements work together to control the amount of light that enters the camera and ultimately affects the final image. In this section, we will delve into the details of each component and explore how they can be manipulated to achieve stunning night sky photographs.
ISO
ISO, or the International Organization of Standardization, is a measure of the camera’s sensitivity to light. A lower ISO setting (e.g., ISO 100 or ISO 200) results in less sensitivity, while a higher ISO setting (e.g., ISO 3200 or ISO 6400) increases sensitivity. In night sky photography, it is essential to use a low ISO setting to minimize noise and maintain details in the image. However, this may require longer exposure times, which can lead to motion blur in the stars.
Shutter Speed
Shutter speed refers to the length of time the camera’s shutter is open, allowing light to enter and capture an image. In night sky photography, slow shutter speeds are typically used to capture the beautiful trails of stars as they move across the sky. A longer exposure time, such as 15 seconds or 30 seconds, can produce stunning images with a multitude of star trails. However, it is crucial to keep the camera steady during the exposure to avoid blur.
Aperture
Aperture, also known as f-stop, is a measure of the camera’s aperture, or the size of the aperture opening within the lens. Aperture affects the amount of light that enters the camera and also has an impact on the depth of field in the image. A larger aperture (e.g., f/1.8 or f/2.8) allows more light to enter the camera and can result in a shorter exposure time. However, a larger aperture also reduces the depth of field, which can make it challenging to capture sharp stars in the image. A smaller aperture (e.g., f/8 or f/11) provides a deeper depth of field, making it easier to capture sharp stars, but may require a longer exposure time.
In summary, understanding and manipulating ISO, shutter speed, and aperture are critical components of night sky photography. By adjusting these settings, photographers can achieve stunning images that capture the beauty and wonder of the night sky.
Tips for Balancing Exposure and Avoiding Overexposure
Proper exposure is crucial for capturing stunning night sky photographs. Here are some tips to help you balance exposure and avoid overexposure:
- Use a tripod: A tripod is essential for keeping your camera still during long exposures, which helps prevent overexposure due to camera shake.
- Use a remote shutter release or self-timer: This will minimize camera shake and ensure that the camera remains still during the exposure.
- Use manual exposure mode: This allows you to have complete control over your camera’s settings, making it easier to achieve the desired exposure.
- Bracket your exposures: This involves taking multiple shots at different exposure settings to ensure that you capture the best possible image.
- Check your histogram: Make sure that the histogram is not being cut off at either end, indicating that the image is over or underexposed.
- Experiment with different ISO settings: Higher ISO settings will make the camera more sensitive to light, which can be useful in low-light situations. However, it can also increase noise in the image.
- Use a neutral density filter: This filter can help reduce the amount of light entering the camera, allowing for longer exposures without overexposing the image.
By following these tips, you can achieve well-exposed night sky photographs that showcase the beauty of the night sky.
Capturing Star Trails and Light Painting
Capturing the beauty of the night sky through photography requires careful consideration of camera settings and exposure techniques. One of the most popular techniques used by photographers is capturing star trails and light painting.
Star Trails
Star trails are a beautiful phenomenon that occurs when the stars appear to move across the night sky over a period of time. To capture star trails, photographers use long exposures, typically ranging from 15 seconds to several minutes. The longer the exposure, the longer the star trails will appear in the final image. It is important to use a tripod to ensure that the camera remains still during the exposure, as any movement can result in blurry images.
To capture star trails, follow these steps:
- Set your camera to manual mode to have full control over the exposure settings.
- Select a low ISO to minimize noise in the image.
- Choose a wide aperture to allow more light into the camera and create a longer exposure.
- Use a long exposure, starting at 15 seconds and increasing the exposure time in increments of 5-10 seconds until the desired length is achieved.
- Use a remote shutter release or the camera’s self-timer to avoid camera shake during the exposure.
- Point the camera towards the sky and focus on a point near the horizon.
- Adjust the composition as desired and capture the image.
Light Painting
Light painting is another technique used to capture the beauty of the night sky. This technique involves illuminating objects or surfaces with a long exposure, creating a glowing trail of light in the final image. To create a light painting, follow these steps:
- Set your camera to manual mode and select a low ISO to minimize noise in the image.
- Choose a wide aperture to allow more light into the camera and create a longer exposure.
- Use a long exposure, starting at 15 seconds and increasing the exposure time in increments of 5-10 seconds until the desired length is achieved.
- Use a flashlight or other light source to illuminate the object or surface you want to capture.
- Move the light source in a specific pattern or design to create the desired effect.
- Adjust the composition as desired and capture the image.
By mastering these techniques, photographers can capture stunning images of the night sky that showcase the beauty and mystery of the universe.
Editing and Processing Night Sky Photography
Choosing the Right Software and Presets
Selecting the appropriate software and presets is crucial in editing night sky photographs. With numerous options available, it can be overwhelming to determine which ones will yield the best results. To help you make an informed decision, here are some factors to consider:
- Functionality: Opt for software that offers a range of features tailored to night sky photography, such as tone mapping, color correction, and noise reduction. It should enable you to enhance the brightness and contrast of your images while preserving the detail and clarity of the stars.
- User Interface: A user-friendly interface makes the editing process more enjoyable and efficient. Choose software that is intuitive and easy to navigate, allowing you to focus on your creative vision rather than getting bogged down by technical challenges.
- Compatibility: Ensure that the software you select is compatible with your operating system, whether it’s Windows, macOS, or Linux. Some software may have specific system requirements, so it’s essential to verify that your computer meets those requirements before investing in the program.
- Cost: Consider your budget when selecting software. Some programs offer free trials or basic versions, while others require a purchase or subscription. Determine what features you need and compare the costs of various options to find the best value for your investment.
- Community and Support: Look for software with an active community of users and a strong support system. This can provide valuable resources, such as tutorials, forums, and user-generated content, to help you learn and troubleshoot any issues that may arise during the editing process.
- Presets: When it comes to presets, it’s important to choose those specifically designed for night sky photography. Look for presets that emphasize the colors and contrast of the stars while minimizing noise and enhancing the overall aesthetic of your images. Be cautious of generic presets that may not produce the desired results for night sky photos.
By carefully evaluating your options and considering these factors, you can select the right software and presets to bring out the best in your night sky photographs.
Adjusting Colors and Contrast
Capturing the beauty of the night sky through photography requires careful planning, timing, and post-processing techniques. One of the most critical aspects of editing night sky photographs is adjusting the colors and contrast. In this section, we will explore the various techniques and tools used to enhance the colors and contrast of night sky images, resulting in stunning and realistic photos.
Importance of Color Adjustment
The colors in night sky photography can be deceiving, as the human eye perceives the sky as dark blue or black, while the camera captures a broader range of colors. To achieve a more accurate representation of the night sky, color adjustment is essential. It helps to enhance the colors, bringing out the details and vibrancy of the stars and celestial objects.
Balancing the Color Cast
Night sky photography often results in a color cast, usually magenta or green, due to the camera’s auto white balance setting. To correct this, it is essential to adjust the white balance to a more appropriate setting, such as tungsten or cloudy, depending on the lighting conditions. This helps to restore the natural colors of the night sky and eliminate the unwanted color cast.
Contrast Adjustment Techniques
Contrast is another crucial aspect of night sky photography editing. The sky can appear washed out and lack detail, while the stars may appear too bright or overexposed. To address these issues, photographers can use various contrast adjustment techniques, such as:
- Curves Adjustment: This technique involves adjusting the brightness and contrast of the image using a curve graph. By adjusting the curve points, photographers can create a more balanced and visually appealing image.
- Histogram Adjustment: This method involves analyzing the histogram of the image to identify the areas of high and low contrast. By pushing the shadows and pulling the highlights, photographers can create a more balanced and detailed image.
- Levels Adjustment: Similar to the histogram adjustment, levels adjustment involves adjusting the brightness and contrast of the image using a histogram graph. By moving the black, white, and gray points, photographers can create a more balanced and realistic image.
The Role of Post-Processing Software
To achieve the desired results in night sky photography editing, post-processing software plays a crucial role. Popular software such as Adobe Lightroom and Photoshop offer a range of tools and adjustments that enable photographers to enhance the colors and contrast of their images. These software applications also provide a range of presets and plugins that can save time and help achieve stunning results quickly.
In conclusion, adjusting the colors and contrast of night sky photographs is a critical aspect of post-processing. By understanding the importance of color adjustment, balancing the color cast, and applying contrast adjustment techniques, photographers can transform their images into stunning works of art. The use of post-processing software further enhances the editing capabilities, enabling photographers to achieve realistic and visually appealing night sky photographs.
Enhancing Details and Reducing Noise
One of the challenges of night sky photography is capturing the subtle details of the stars and other celestial objects against a dark and often low-light background. This can be especially difficult when shooting in low-light conditions, where noise and image degradation can quickly become apparent. However, with the right tools and techniques, it is possible to enhance the details of your night sky photos and reduce noise for stunning results.
Increasing Detail with Image Stacking
Image stacking is a technique that involves combining multiple images of the same scene to create a single image with greater detail and lower noise. This method is particularly useful for night sky photography, as it allows you to capture more detail in the darker areas of the image and reduce noise. To create an image stack, you will need to take multiple exposures of the same scene, making sure to include the same objects in each shot. You can then use image editing software to combine the images into a single image with increased detail and reduced noise.
Reducing Noise with Long Exposures
Another technique for reducing noise in night sky photography is to use longer exposures. Longer exposures allow more light to enter the camera’s sensor, which can help reduce noise and improve image quality. However, longer exposures can also introduce other issues, such as motion blur, so it is important to use a tripod or other stabilizing device to keep the camera steady during longer exposures.
Adjusting Exposure Settings
Adjusting your camera’s exposure settings can also help reduce noise in night sky photography. One common technique is to underexpose the image slightly, which can help reduce noise and increase detail in the darker areas of the image. However, this can also lead to a loss of detail in the brighter areas of the image, so it is important to find the right balance between underexposure and overexposure. Additionally, adjusting the ISO setting can also help reduce noise, although this can also introduce other issues, such as image grain.
By using these techniques and others, it is possible to enhance the details of your night sky photos and reduce noise for stunning results. Whether you are a beginner or an experienced photographer, night sky photography can be a challenging and rewarding pursuit, and these techniques can help you unlock the mysteries of this fascinating subject.
Safety Considerations for Night Sky Photography
Dealing with Weather Conditions and Wildlife
While night sky photography can be an awe-inspiring experience, it is essential to take safety considerations seriously. Dealing with weather conditions and wildlife are crucial aspects of ensuring a safe and successful night sky photography session.
Weather Conditions
The weather plays a significant role in night sky photography. Ideally, you want clear skies to capture stunning images of the stars and other celestial bodies. However, finding the perfect weather conditions can be challenging. Here are some tips to help you deal with weather conditions while night sky photography:
- Check the weather forecast: Before embarking on your night sky photography session, check the weather forecast. This will help you plan accordingly and avoid getting caught in adverse weather conditions.
- Be prepared for sudden changes: Be prepared for sudden changes in the weather. Bring extra layers of clothing, a flashlight, and a first aid kit in case you encounter unexpected weather conditions.
- Plan your shoot accordingly: If the weather is not ideal, consider changing your plans. For example, you can focus on capturing images of the Milky Way instead of trying to capture the stars.
Wildlife
While wildlife may not pose a direct threat to your safety, it is still essential to take precautions when photographing at night. Some animals may be startled by the noise and light, while others may be attracted to the equipment. Here are some tips to help you deal with wildlife while night sky photography:
- Use a tripod: Using a tripod will help you keep your equipment stable and prevent accidental movements that may startle wildlife.
- Use a remote shutter release: Using a remote shutter release will help you avoid accidentally startling wildlife by moving the camera when taking a shot.
- Keep noise levels to a minimum: Keep noise levels to a minimum to avoid startling wildlife. Turn off your phone and avoid using flash.
- Respect wildlife: Always respect wildlife and their habitat. Avoid disturbing their natural behavior and always leave the area as you found it.
By taking these safety considerations seriously, you can ensure a safe and successful night sky photography session. Remember to check the weather forecast, be prepared for sudden changes, and respect wildlife to avoid any potential safety hazards.
Being Respectful of Locations and Other Photographers
When it comes to night sky photography, it’s important to be respectful of both the locations you’re shooting at and the other photographers who may be there. Here are some guidelines to keep in mind:
- Respecting Location
- Always check local laws and regulations before setting up your equipment. Some locations may require permits or have restrictions on photography, especially when it comes to public parks or natural reserves.
- Be mindful of the environment and avoid leaving any trash or trampled areas. It’s essential to leave the location as you found it and not disturb the natural habitat.
- Be courteous to other visitors or locals who may be in the area. Try to be as unobtrusive as possible and avoid blocking pathways or disturbing others who may be enjoying the location.
- Respecting Other Photographers
- If you find yourself in a popular location with other photographers, be courteous and considerate of their space. Avoid getting too close to their equipment or interfering with their shots.
- If you’re using a tripod or other equipment that may obstruct others’ views, try to position it in a way that doesn’t hinder their photography.
- If you’re working in a group, designate a leader to communicate with other photographers and ensure everyone is aware of each other’s presence and equipment.
By being respectful of both the locations you’re shooting at and the other photographers, you can help create a positive community around night sky photography and ensure everyone can enjoy the experience.
Inspiration and Further Reading
Famous Night Sky Photographers
Timothy Reed
Timothy Reed is a well-known night sky photographer, known for his breathtaking images of the Milky Way and other celestial wonders. His passion for photography began at a young age, and he has since honed his skills to capture some of the most stunning night sky images.
James Martin
James Martin is another famous night sky photographer, whose work has been featured in various magazines and exhibitions. He has a unique style of photography that combines long exposures and multiple shots to create intricate images of the night sky. His images often depict the movement of stars and planets, capturing the beauty and complexity of the universe.
David Kingham
David Kingham is a UK-based night sky photographer who has gained recognition for his stunning images of the Milky Way and other celestial objects. He has a deep understanding of the technical aspects of photography and uses this knowledge to create images that are both technically sound and aesthetically pleasing.
Michael Goh
Michael Goh is a night sky photographer from Singapore, known for his striking images of the Milky Way and other celestial wonders. He has a unique style of photography that combines long exposures and panoramic shots to create images that are both awe-inspiring and technically impressive.
These famous night sky photographers are just a few examples of the many talented photographers who have dedicated their lives to capturing the beauty of the night sky. Their work serves as an inspiration to aspiring photographers and reminds us of the awe-inspiring beauty of the universe.
Online Resources and Communities
- One of the best ways to improve your night sky photography skills is by joining online communities and resources.
- These platforms offer a wealth of information, including tutorials, tips, and tricks from experienced photographers.
- Some popular online resources include:
- Astro Photography Tips: A website dedicated to providing astrophotography tips, techniques, and inspiration.
- The Astro Community: A community of astrophotographers who share their work, provide feedback, and offer tips and tricks.
- Stellar Photography: A YouTube channel run by professional photographer and astrophotographer, Thomas V. Loew.
- By participating in these communities, you can learn from others, share your own work, and gain inspiration for your next night sky photography project.
Upcoming Trends and Techniques in Night Sky Photography
Night sky photography is an ever-evolving field, with new trends and techniques emerging constantly. As technology advances and photographers push the boundaries of what is possible, the art of capturing the night sky has become more accessible and diverse. In this section, we will explore some of the upcoming trends and techniques in night sky photography that are shaping the future of this captivating art form.
Drone Photography
One of the most exciting trends in night sky photography is the use of drones. Drones equipped with cameras offer photographers a unique perspective, allowing them to capture breathtaking aerial views of the night sky. With their ability to fly high above ground, drones provide photographers with the opportunity to capture the stars in a way that was previously impossible.
Time-Lapse Photography
Time-lapse photography is another trend that is gaining popularity in night sky photography. By capturing a series of images over a period of time and then combining them into a video, photographers can create mesmerizing time-lapse sequences that showcase the movement of the stars and the changing colors of the night sky. This technique requires careful planning and precise timing, but the results can be truly stunning.
Astrophotography and Deep Sky Objects
Astrophotography is a specialized form of night sky photography that involves capturing images of celestial objects beyond the Earth’s atmosphere. This includes galaxies, nebulae, and star clusters, which can be captured using specialized equipment such as telescopes and astronomical cameras. As technology continues to advance, astrophotography is becoming more accessible to amateur photographers, who are eager to capture the beauty of deep sky objects.
Light Painting and Long Exposure Techniques
Light painting and long exposure techniques are also becoming increasingly popular in night sky photography. By using long exposures and carefully illuminating the scene with light, photographers can create surreal and abstract images that showcase the beauty of the night sky in new and creative ways. These techniques require careful planning and experimentation, but the results can be truly breathtaking.
Overall, the future of night sky photography looks bright, with new trends and techniques emerging all the time. As technology continues to advance and photographers push the boundaries of what is possible, the art of capturing the night sky will continue to evolve and inspire.
FAQs
1. What equipment do I need for night sky photography?
To capture stunning images of the night sky, you will need a camera with manual settings, a tripod, and a remote shutter release. A DSLR or mirrorless camera with interchangeable lenses is recommended, as it offers more flexibility in terms of lens selection. You will also need a lens that is suitable for astrophotography, such as a wide-angle lens with a low focal length and a wide aperture. Additionally, you may want to consider using a lens with image stabilization to help minimize camera shake during long exposures.
2. When is the best time to take night sky photos?
The best time to take night sky photos depends on several factors, including your location, the time of year, and the weather conditions. In general, the summer months offer the longest hours of darkness, making them an ideal time for night sky photography. However, if you are located near the equator, the best time to photograph the night sky may be during the winter months. Additionally, it is important to check the weather forecast before heading out to photograph the night sky, as clear skies are essential for capturing stunning images.
3. How do I find interesting objects in the night sky to photograph?
There are many resources available to help you find interesting objects in the night sky to photograph, such as star charts, astronomy apps, and online resources. The Orion Nebula, the Andromeda Galaxy, and the Milky Way are just a few examples of the many beautiful objects that can be captured in night sky photos. You can also consider attending a stargazing event or joining a local astronomy club to connect with other enthusiasts and learn about new objects to photograph.
4. How do I choose the right settings for my camera?
Choosing the right settings for your camera depends on several factors, including the type of shot you want to capture, the brightness of the night sky, and the duration of the exposure. In general, you will want to use a low ISO, a wide aperture, and a longer exposure time to capture the details of the night sky. It is also important to consider the composition of your shot and the overall effect you want to achieve. Experimenting with different settings and techniques is key to developing your own unique style in night sky photography.
5. How do I minimize camera shake during long exposures?
Minimizing camera shake during long exposures is essential for capturing sharp and detailed images of the night sky. One effective technique is to use a remote shutter release, which allows you to trigger the camera’s shutter without touching it. You can also try using a tripod with a sturdy base and adjusting the ISO to a lower setting to reduce camera shake. Additionally, consider using image stabilization features in your lens or camera to help minimize camera shake during long exposures.


