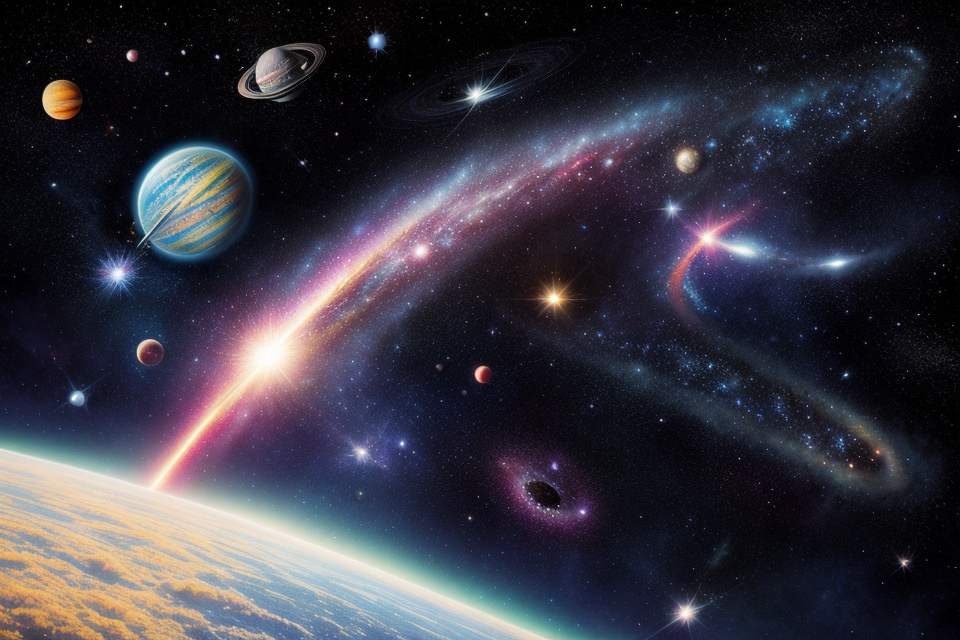
Greetings, fellow stargazers! Are you eager to explore the wonders of our solar system and catch a glimpse of the mighty Jupiter? Choosing the right telescope is crucial to reveal the intricate details of this gas giant. In this guide, we’ll embark on a journey to discover the perfect telescope for observing Jupiter. Whether you’re a seasoned astronomer or a beginner, this essential guide will provide you with valuable insights to enhance your stargazing experience. So, let’s get started and unveil the secrets of our solar system together!
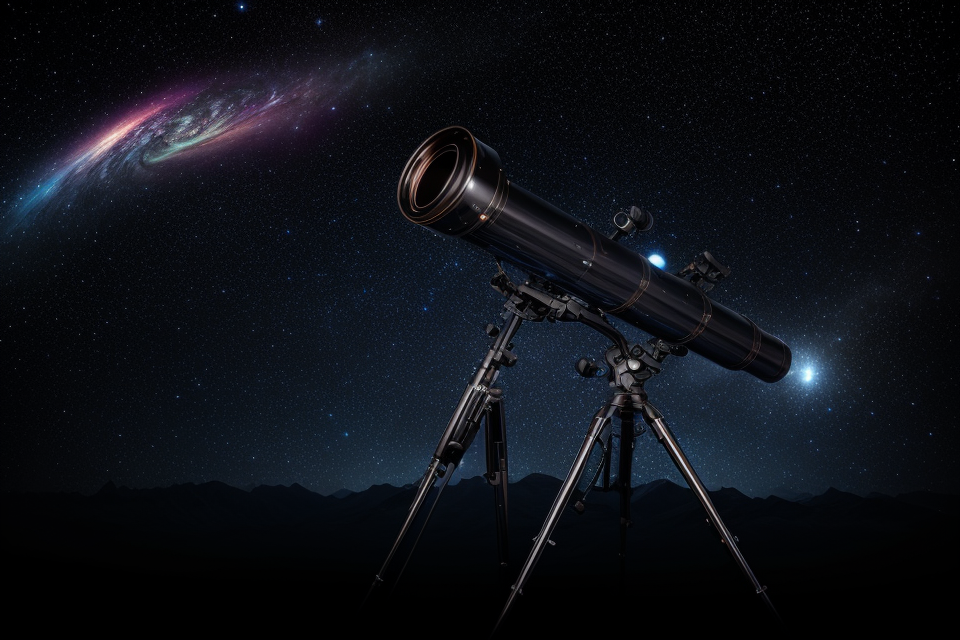
How to Choose the Right Telescope for Viewing Jupiter
Factors to Consider
Choosing the right telescope for viewing Jupiter requires careful consideration of several factors. Here are some key elements to keep in mind when making your selection:
- Aperture: The aperture of a telescope refers to the diameter of its primary mirror or lens. A larger aperture allows more light to enter the telescope, resulting in brighter and clearer images. For viewing Jupiter, a minimum aperture of 6 inches is recommended.
- Magnification: The magnification of a telescope is determined by its focal length and the eyepiece used. For viewing Jupiter, a magnification of at least 100x is recommended. However, it’s important to note that too much magnification can result in a loss of image quality and stability.
- Resolution: The resolution of a telescope is determined by its aperture and the atmospheric conditions. A higher resolution is necessary to see Jupiter’s cloud bands and other surface features in detail. A resolution of at least 1 arc-second is recommended for viewing Jupiter.
- Telescope Mount: The mount of a telescope determines its stability and ability to track objects. For viewing Jupiter, a mount with electronic or computerized controls is recommended to ensure smooth and accurate tracking.
- Budget: Telescopes can vary widely in price, from a few hundred dollars to several thousand dollars. It’s important to set a budget and choose a telescope that meets your needs and fits your budget. Keep in mind that a higher-quality telescope will typically provide better images and longer lifespan.
Recommended Telescopes for Viewing Jupiter
Entry-Level Telescopes
- Aperture: 70-100mm
- Focal length: 400-600mm
- Mount type: Alt-azimuth or equatorial
- Optical tube weight: 10-20kg
- Optical tube diameter: 40-50cm
- Resolution: 20-50 milli-arcseconds
- Magnification: 100-300x
- Objective lens diameter: 70-100mm
- Eyepiece: 10-20mm, 40-60x
- Light-gathering power: 150-250x
- Optical quality: Moderate
- Cost: $200-$1000
Mid-range Telescopes
- Aperture: 100-150mm
- Focal length: 600-900mm
- Optical tube weight: 20-30kg
- Optical tube diameter: 50-60cm
- Resolution: 10-20 milli-arcseconds
- Magnification: 200-500x
- Objective lens diameter: 100-150mm
- Eyepiece: 8-16mm, 50-90x
- Light-gathering power: 300-500x
- Optical quality: Good
- Cost: $1000-$3000
High-end Telescopes
- Aperture: 150-200mm
- Focal length: 900-1200mm
- Mount type: Equatorial
- Optical tube weight: 30-50kg
- Optical tube diameter: 70-80cm
- Resolution: 5-10 milli-arcseconds
- Magnification: 300-1000x
- Objective lens diameter: 150-200mm
- Eyepiece: 5-12mm, 80-160x
- Light-gathering power: 500-1000x
- Optical quality: Excellent
- Cost: $3000-$10000
It is important to consider your budget, space constraints, and experience level when choosing a telescope for viewing Jupiter. An entry-level telescope is a great option for beginners who want to get a feel for stargazing without breaking the bank. Mid-range telescopes offer more advanced features and are suitable for experienced stargazers who want to observe more details on Jupiter. High-end telescopes are perfect for experienced astronomers who want to observe Jupiter in great detail and take astrophotography.
Understanding Jupiter and Its Moons
Basic Facts about Jupiter
- Size and Mass
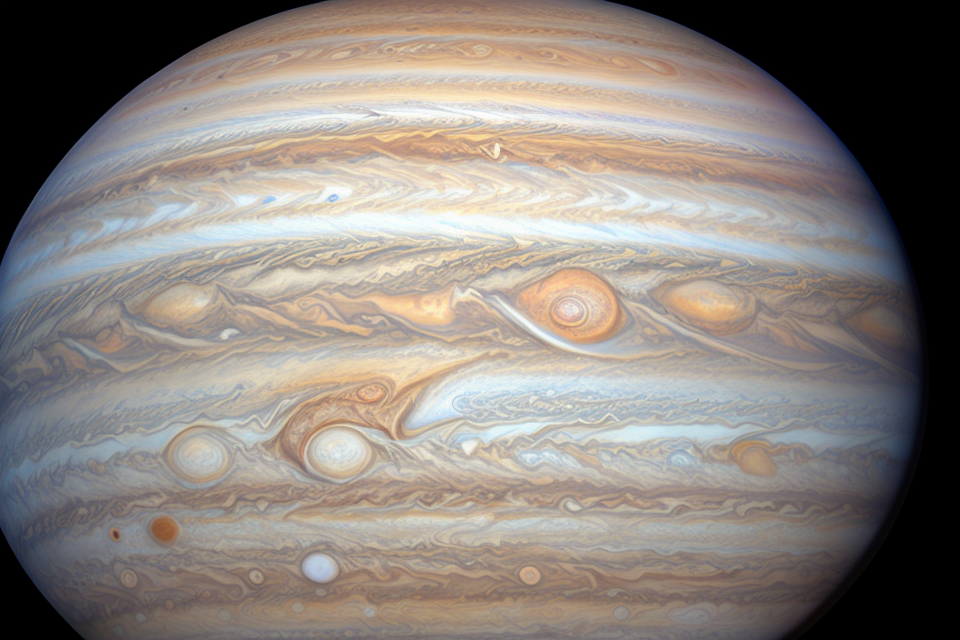
Jupiter is the largest planet in our solar system, with a diameter of approximately 88,846 miles (142,984 kilometers). It is also the third most massive planet, with a mass of about 317.8 Earths. Its immense size and mass give it a significant gravitational pull, which contributes to its impressive storm systems and weather patterns.
- Atmosphere and Weather
Jupiter’s atmosphere is primarily composed of hydrogen and helium gases, with trace amounts of other elements. The planet’s Great Red Spot, a massive storm system, has been a captivating feature for astronomers for centuries. In addition to the Great Red Spot, Jupiter’s atmosphere is marked by swirling cloud systems, lightning bolts, and a complex array of weather patterns.
- Rotation and Orbit
Jupiter’s rotation period is the shortest of all the gas giants, with a day lasting only 9 hours and 56 minutes. This rapid rotation has led to the formation of a fluid-like weather system, with the atmosphere appearing to be in a constant state of motion.
Jupiter’s orbit around the Sun takes approximately 11.8 years, and it is the fifth planet from the Sun. The planet’s distance from the Sun, combined with its immense size and mass, create favorable conditions for the formation of a powerful and dynamic weather system.
Jupiter’s moons, particularly Europa and Ganymede, are of great interest to scientists for their potential to support life. The underground oceans on these moons could harbor conditions suitable for certain types of microbial life, making them prime targets for future space exploration.
Exploring Jupiter’s Moons
Jupiter, the largest planet in our solar system, is known for its striking appearance and the numerous moons that orbit around it. In this section, we will delve into the exploration and study of Jupiter’s moons, specifically the Galilean moons and other notable moons.
Galilean Moons
The Galilean moons, named after the Italian astronomer Galileo Galilei, are the four largest moons of Jupiter: Io, Europa, Ganymede, and Callisto. These moons were first discovered by Galileo in 1610 and have since been studied extensively by astronomers.
Io, the closest moon to Jupiter, is the most geologically active moon in our solar system. It is also the smallest of the Galilean moons, with a diameter of approximately 3,400 kilometers. Io’s surface is covered in sulfur dioxide frost and lava flows, resulting in a diverse and ever-changing landscape.
Europa, the second-largest Galilean moon, is known for its smooth, icy surface. It is thought that beneath the surface, there may be a vast ocean of liquid water, making it a prime target for the search for extraterrestrial life.
Ganymede, the largest moon in our solar system, is also the largest planetary satellite in the solar system. It has a diameter of approximately 5,262 kilometers and is composed primarily of water ice.
Callisto, the farthest Galilean moon from Jupiter, is the most heavily cratered object in our solar system. It has a diameter of approximately 4,800 kilometers and is composed primarily of rock and ice.
Other Notable Moons
In addition to the Galilean moons, Jupiter has many other notable moons that have been studied by astronomers. These include moons such as Amalthea, which is thought to be composed primarily of ice and rock, and Metis, which is the closest moon to Jupiter and orbits the planet every 28 hours.
Exploration and Study
The exploration and study of Jupiter’s moons has been a key area of research for astronomers. In recent years, spacecraft such as NASA’s Juno mission and the Europa Clipper mission have been sent to study Jupiter and its moons in greater detail. These missions have provided valuable insights into the composition, geology, and potential habitability of Jupiter’s moons.
Overall, the exploration and study of Jupiter’s moons is an exciting area of research that continues to provide new insights into our solar system and the potential for life beyond Earth.
Observing Jupiter: Tips and Techniques
Finding the Best Viewing Location
- Dark Sky Sites
- Locations far away from city lights and other sources of pollution can provide a better viewing experience.
- Remote areas such as mountains, deserts, and forests are ideal for stargazing.
- Websites like Sky-Skan and International Dark-Sky Association can help find the best locations.
- Time of Year
- The best time to observe Jupiter is during the spring and summer months.
- Jupiter’s position in the sky is higher during these seasons, making it easier to see.
- It is also recommended to observe Jupiter during the week after full moon when the sky is darker.
- Weather Conditions
- Clear and stable weather conditions are ideal for telescope observation.
- Cloudy, foggy, or windy weather can hinder the viewing experience.
- It is important to check the weather forecast before planning an observation session.
- Telescopes can also be used during daytime to observe Jupiter’s moons, but the view is best during the evening.
Setting Up Your Telescope
Alignment and Calibration
Before you begin observing Jupiter, it is essential to align and calibrate your telescope properly. This step is crucial to ensure that your telescope is working correctly and to obtain accurate and clear images. The first step in alignment and calibration is to mount the telescope securely on a sturdy tripod and level it. Next, adjust the position of the telescope’s mirrors or lenses to ensure that they are correctly aligned. You can use a laser pointer or a star chart to help you with this process. Once the mirrors or lenses are aligned, you can proceed to calibrate the telescope’s focusing system.
Focusing and Adjustments
After the alignment and calibration process, the next step is to focus and adjust the telescope’s settings. The focusing process involves adjusting the position of the eyepiece to obtain a clear and sharp image of Jupiter. Start by looking through the eyepiece without making any adjustments and then make small adjustments to the eyepiece until the image becomes clearer. Once you have achieved a clear image, you can adjust the telescope’s settings to enhance the image’s clarity and sharpness. This step is crucial as it will determine the quality of the images you obtain.
Using Eyepieces and Accessories
After focusing and adjusting the telescope’s settings, the next step is to use the appropriate eyepieces and accessories. The eyepiece is an essential component of the telescope, and it determines the magnification and field of view of the images you obtain. You can choose from a variety of eyepieces with different magnification levels and fields of view to suit your observing needs. Additionally, you can use accessories such as filters, polarizing glasses, and camera adapters to enhance the quality of the images you obtain. These accessories can help you capture stunning images of Jupiter and its moons.
By following these steps, you can set up your telescope correctly and obtain clear and sharp images of Jupiter and its moons. Remember to take your time and be patient when setting up your telescope, as this process is crucial to the success of your observing session.
Enhancing Your Observation Experience
Enhancing Your Observation Experience
Optimizing your observation experience requires a combination of techniques to improve the quality of your observations. By employing these strategies, you can make the most of your time spent observing Jupiter and enhance the overall experience.
Tracking and Motion Control
Equatorial Mounts
An equatorial mount is a critical component for precise tracking and motion control during observations. This type of mount provides two critical features:
- Alt-Azimuth Mount: An alt-azimuth mount allows you to move the telescope along two axes – altitude (up and down) and azimuth (left and right). This motion control enables the telescope to track the apparent motion of Jupiter across the sky.
- Right Ascension and Declination: Equatorial mounts have built-in mechanisms that allow the telescope to move in right ascension (R.A.) and declination (Dec.). These two axes correspond to the celestial coordinates of a celestial object. By adjusting the mount in R.A. and Dec., you can align the telescope with the exact position of Jupiter in the sky.
Electronic Setting Circles
Electronic setting circles are an advanced feature found in some modern telescopes and mounts. These devices provide a high level of precision and convenience for tracking celestial objects. Electronic setting circles automate the process of aligning the mount with the object, greatly simplifying the observation process.
Image Processing and Capture
Image Enhancement
Image enhancement techniques can significantly improve the quality of the images captured during observations. These techniques include:
- Stacking: Image stacking involves combining multiple images of the same object taken through different filters or at different exposures. This process can reveal more details in the image and reduce noise.
- Deconvolution: Deconvolution is a technique that separates the original image into its individual components. This process can reveal subtle details in the image that would otherwise be hidden by noise.
Image Capture
Capturing high-quality images of Jupiter requires careful consideration of several factors:
- Camera Settings: Choosing the right camera settings is crucial for capturing sharp and detailed images. Adjusting the camera’s gain, exposure time, and other settings can greatly affect the final image quality.
- Filter Selection: Selecting the appropriate filters for your observations can greatly enhance the details visible in the final image. Filters can be used to enhance contrast, block specific wavelengths, or reduce noise.
Cloudy Nights and Alternative Sources
Weather Monitoring
Monitoring weather conditions is essential for successful observations. Keeping track of weather patterns and cloud cover can help you plan your observing sessions and make the most of your time.
Alternative Sources
In the event of unfavorable weather conditions, there are alternative sources available for observing Jupiter. These include:
- Online Resources: Websites and online resources can provide real-time images and data about Jupiter. These resources can offer valuable insights into the planet’s current appearance and weather patterns.
- Simulation Software: Simulation software can provide a virtual observatory experience, allowing you to explore Jupiter’s appearance and features in a simulated environment. This can be a valuable tool for planning your observations and learning about the planet’s characteristics.
Enjoying the Journey: Telescope Maintenance and Storage
Keeping Your Telescope in Good Condition
Cleaning and Maintenance
Proper maintenance is crucial to ensure the longevity and performance of your telescope. Regular cleaning and maintenance will not only improve the image quality but also prevent damage to the optics. Here are some essential steps to keep your telescope in good condition:
- Regular cleaning: Dust and debris can accumulate on the lenses and mirrors, causing a loss of image quality. Use a soft, dry cloth to wipe away any visible dust or dirt. For more stubborn grime, use a lens pen or a solution specifically designed for cleaning optical glass.
- Lubrication: Regular lubrication of the focusing mechanism and other moving parts will ensure smooth operation and prevent wear and tear. Use a lubricant specifically designed for telescopes, such as a silicone-based lubricant.
- Protective coatings: Some telescopes have protective coatings, such as anti-reflective coatings, which can be damaged by harsh cleaning chemicals or abrasive materials. Always check the manufacturer’s recommendations before cleaning or maintaining your telescope.
Upgrades and Accessories
Upgrades and accessories can enhance your telescope’s performance and functionality. Here are some popular upgrades and accessories to consider:
- Eyepieces: Different eyepieces can provide varying levels of magnification and field of view. Consider upgrading to higher quality eyepieces for improved image quality and performance.
- Mounts and tripods: Upgrading to a sturdier mount or tripod can improve the stability and accuracy of your telescope.
- Accessories: Accessories such as star diagonals, filter sets, and camera adapters can enhance your telescope’s functionality and versatility.
Troubleshooting Common Issues
Despite proper maintenance, issues can still arise. Here are some common issues and their troubleshooting solutions:
- Misaligned optics: Misaligned optics can cause blurry or distorted images. Use the alignment procedures provided by the manufacturer to properly align the optics.
- Focusing issues: If the image is out of focus, adjust the focusing knob or use the fine-tuning adjustments provided by the manufacturer.
- Obstructed view: Ensure that any obstructions, such as trees or buildings, are cleared from the observing area.
By following these steps, you can keep your telescope in good condition and ensure many years of enjoyable stargazing.
Storing Your Telescope Safely
Proper storage is crucial to ensure the longevity and continued functionality of your telescope. Follow these guidelines to protect your investment and prepare for future observing sessions.
Protecting Your Investment
Taking care of your telescope is essential to preserve its value and performance. To protect your investment, consider the following steps:
- Clean the optics: Regularly clean the mirrors and lenses to maintain their clarity and prevent damage.
- Cover the lenses: When not in use, cover the lenses to prevent dust buildup and protect them from scratches.
- Inspect for damage: Before each use, inspect your telescope for any signs of damage or wear.
Choosing the Right Storage Space
The storage space you choose for your telescope will depend on its size and the available space in your home. Consider the following factors when selecting a storage space:
- Climate control: Ideally, the storage space should be cool, dry, and free from extreme temperatures. This will help prevent damage to the telescope’s delicate components.
- Ventilation: Ensure that the storage space has good ventilation to prevent moisture buildup, which can cause rust and corrosion.
- Accessibility: Choose a storage space that is easily accessible and not prone to being knocked over or damaged.
Preparing for Future Observing Sessions
To prepare for future observing sessions, consider the following steps:
- Check the equipment: Before each use, inspect the telescope and its accessories to ensure they are in good working condition.
- Clean and lubricate the equipment: Regular cleaning and lubrication will help keep the telescope functioning smoothly and prevent damage.
- Set up the telescope: Set up the telescope in its storage space to make it easier to use when you’re ready to observe.
By following these guidelines, you can ensure that your telescope is well-maintained and ready for future observing sessions.
FAQs
1. What is the minimum telescope required to see Jupiter?
Jupiter is a relatively bright planet, so it can be seen with a telescope as small as 60mm in diameter. However, the size of the telescope will greatly affect the level of detail that can be seen on the planet’s surface. A larger telescope, such as an 8-inch or 10-inch, will provide much more detail and a clearer image than a smaller telescope.
2. What are the best telescopes for viewing Jupiter?
There are many great telescopes for viewing Jupiter, but some of the best include refractors, reflectors, and catadioptric telescopes. Refractors are telescopes that use lenses to gather and focus light, while reflectors use mirrors. Catadioptric telescopes use both lenses and mirrors. These types of telescopes all have their own advantages and disadvantages, so it’s important to research and compare them before making a purchase.
3. How far away should I be from the telescope to see Jupiter clearly?
The distance between the telescope and Jupiter will depend on the size of the telescope and the magnification being used. As a general rule, the further away from the telescope you are, the more stable and comfortable you will be while observing. A good starting point is to be at least three times the diagonal length of the telescope away from the telescope. For example, if you have an 8-inch telescope, you should be at least 10 feet (120 inches) away from the telescope.
4. Can I see Jupiter’s moons with a telescope?
Yes, Jupiter’s moons can be seen with a telescope. The four largest moons, known as the Galilean moons, are particularly easy to see and can be observed with a telescope as small as 60mm in diameter. Larger telescopes will provide a clearer and more detailed view of the moons.
5. When is the best time to view Jupiter?
Jupiter can be viewed at any time of the year, but the best time to view it will depend on your location and the time of year. In the Northern Hemisphere, the best time to view Jupiter is in the spring and summer months, while in the Southern Hemisphere, the best time to view it is in the fall and winter months. It’s also important to note that Jupiter is only visible in the evening, so it’s best to observe it after the sun has set.